Students Start Here… Photoshop Elements the Key to Digital Media

Learning to use selection tools.

Learning to use selection tools.

Last week I had the pleasure of introducing the Adobe Digital School Collection (ADSC) to a group of Massachusetts educators during the PreConference workshop of MassCUE (October 26, 2010).  The Adobe Digital School Collection is a bundle of software optimized for creating digital media content.  The most important applications are Adobe Photoshop Elements (PSE) and Premiere Elements (Pre), the first handles image creation and editing and the later video.   In my experience, most students and teachers don’t have an opportunity to use these programs on a daily or even weekly basis.

The first activity that I introduced during the PreCon workshop was focused on setting up and building a Photoshop Elements catalog.  The origins of the catalog lesson came from my district’s use of DeepFreeze on all school computers.  DeepFreeze prevents users from altering or permanently storing files on shared school computers.  In order for a user to build an intelligent portfolio of digital images, Photoshop Elements requires a dedicated storage space for building an ongoing catalog.  The analogy here is like collecting toy cars and having plenty of shelves to display and organize them. The shelves need to stay put and your toy cars shouldn’t disappear.  Fortunately, PSE gives users the ability to create custom catalogs that can happily live on a flash drive.  In my school, students participating in our Adobe Youth Voices digital media program each receive their own flash drives.  The workshop participants learned to setup a flash drive catalog.  The lesson plan including all the media assets are available on the Adobe Education Exchange.  Look for Introduction to Photoshop Elements 8 Catalogs – The De Young Museum Portfolio.

Spooky castles?

Spooky castles?

Once teachers had a working catalog we explored the world of selection tools using a lesson shared by Sara Martin over the Ed Exchange.  In horror of Halloween, I challenged teachers to create the spookiest castle using selection tools, shapes, effects, and filters.

After students master editing still images I like to introduce the PSE slideshow editor to move them into video.  The skills needed to master good video production require about 10 times the effort and commitment to learning to become really proficient.  I explained to the workshop teachers that video consumes about 10x more hard disk space than still images especially when High Definition video cameras are readily available.  If you are new to the Digital School Collection, my recommendation is to build your foundation in Photoshop Elements.  This photography slide show was created exclusively in Photoshop Elements using the slideshow editor.   If you like the effect, you are probably responding to the combination of photographic imagery, movement, music, slide transitions and timing.  Challenge your students to build highly polished slide shows before diving into the world of video.  Posting the best slide shows on a streaming video site for everyone to see and comment on will motivate your students to work harder.

We recently surveyed a group of middle school students on their use of technology and software.  As expected the most popular activity was texting, 92% of students reported texting everyday or at least 2-3 times per week.  The next most popular activity was watching YouTube video at 82%.  I always ask students if they would like to be the ones creating the content that everyone WANTS to watch?  What tech integration projects using Photoshop Elements do you want to teach?

Wikis: The Ultimate Time-Lapse Learning Tool

One area of photography that acts as a bridge between classic still image photography and video is time-lapse photography. Time-lapse photography consists of taking a series of photos at regular intervals and then displaying them one after the other.  The effect can be used to show patterns that are not normally observed in real time.  Clouds make a terrific subject for time-lapse photography as they roll across the sky.  My clouds time-lapse long photo consisted of taking 150 photos using a intervalometer set to take one photo every 5 seconds.  Using QuickTime Pro the photos were converted into a sequence displayed at 15 frames per second in a QuickTime movie with a total elapsed time of 10 seconds.  How long did it take to shoot this time-lapse? Was is worth the time? The first question requires basic math skills the second one is based on opinion.  One stunning use of time-lapse was produced by Dan Chung during China’s 60th Anniversary national day on October 1, 2009.

Helping teachers think through their desire to integrate technology into their classroom instruction requires patience and an attention to detail similar to that required to produce good time-lapse images.  Teachers know that good classroom instruction requires an enormous amount of thought and attention to detail.  Adding technology to the mix increases the demands made on teachers to acquire new skills.   Many teachers are inspired to take the plunge to learn a new technology if it means their students will respond positively to the learning experience.  What technology tool is the most important one for teachers to master? It’s the wiki.  Why? Wikis build on basic word processing skills so you can quickly add text content to a sharable web page.   The sharable nature of wikis make them part of what’s termed Web 2.0.  The key to harnessing the instructional potential of the wiki lies in their ability to show growth.  Think of a wiki as a time lapse learning tool, where learning can be captured and nurtured over a period of time.

Google Analytics Becoming America wiki report map for Massachusetts

Google Analytics Becoming America wiki report map for Massachusetts (8/14 thru 10/17)

A recent example of time-lapse learning can be illustrated through the Becoming America wiki.  Becoming America is a new Teaching American History Grant project that provides professional development for teachers in six school districts.  The end goal for teachers is to create an American history lesson composed of primary sources found in the many libraries, archives, and historic sites located across eastern Massachusetts.  Through this research process, teachers learn to think historically while breathing new life into their American history curricula.   Since the wiki’s launch in August 2009, it has logged 3300 hits with Braintree teachers accounting for 27% of the hit count.   Braintree teachers use the wiki the most because they cannot attend face-to-face meetings.  All teachers use the wiki to respond to questions posed by project historians using the discussion tab.  Historians appreciate being able to view teacher responses before giving their seminars.  As teachers begin creating their lessons the wiki will be a critical resource for organizing primary sources and weaving them into compelling learning experiences.  The concept of wikis as time-lapse learning tools is best seen using the history function for any page.  The Unit Teams 2009 page’s history tab reveals there have been 16 updates to the page since it was created on Oct. 5th.  Clicking on any of the updates shows what changes were made.  Each individual update represents one frame of a time-lapse record of learning.

What time-lapse Web 2.0 tool do you use?

If you are interested in learning more about time-lapse photography visit the DigitalArtworks Time-Lapse Tutorial.

Reflections on Film to Digital Photography 1983-2008

My Simpson3 psx galleryHow many of your students own a digital camera?  Is a digital camera a toy or a tool?  If your students own a cell phone, is it equipped with a camera?  Teachers should welcome the digital camera as a learning tool.  Time to hop in the way back machine… remember when pictures were taken with film cartridges, sent to the photo lab, and half the printed photos were rejects after waiting a week?  OK, fair enough you can still use film and receive your photos in an hour.  My fascination with photography began in 1983 while attending Frisbee Middle School in Kittery, Maine as an 8th grader, when I learned the entire film processing workflow.  Snap, develop, and print.

Understanding the true wonders of film photography can only be experienced by breaking a film canister open in a darkroom, rolling the film onto a spool, inserting the spool into a canister, and then turning the lights on to add developer.  Pay attention to the time now — rinse, and then the moment of truth… unfurl your negative.  Simpson photographic film negative 1983If you are successful, you can immediately see the negative image of your shots.  Once the negative is dry, cut into workable strips, and then the fun really begins.  Turn the overhead lights off, turn on the funky darkroom light, and insert your negative into an enlarger.  Open the baffle to shine light through the negative and adjust the focus.  Close the baffle, align a piece of photographic paper on the base of the enlarger, open baffle — timings everything – let’s try 10 seconds.  No picture yet… immerse the paper in developer solution rocking the tray back and forth and watch as the ghostly image appears.  Another chemical bath, rinse, and it’s off to the drying rack.

While this was quite a time consuming process, each step provided ample opportunity to make adjustments by carefully monitoring each step.  For example, if I shot in bright sunlight, I would leave my negative in developer for additional 15 seconds.   The extra time would result in more silver depositing onto the negative increasing contrast.  The real artistry entered the process at the enlarger, masking parts of the photographic paper burned in sections of the image resulting in greater contrast.  The benefits to abandoning this somewhat ancient process to the digital domain is two-fold, (1) elimination of toxic chemicals into the environment and (2) increased time devoted to creativity and innovation.  Students can now spend time in the virtual darkroom using desktop programs such as Adobe Photoshop or its Web 2.0 cousin, Express to perfect their images.

Adobe Photoshop Meets Web 2.0

What happens when Adobe Photoshop meets Web 2.0? Answer: Photoshop Express (psx). Two of the central tenets of Web 2.0 are an ability to move content to the web and then provide an easy mechanism to distribute the content to others. Psx is a free beta program that provides 2GBs of storage with the ability to perform Photoshop style edits through the web. 
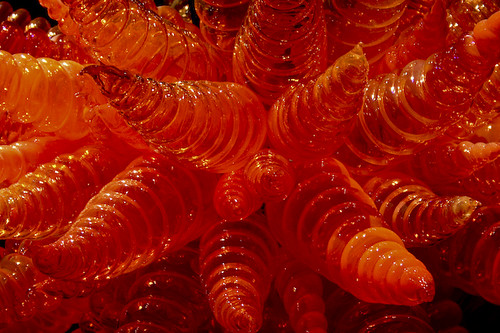
For the last year, I’ve used Flickr to post my images to the web. Each image has a unique web address (URL) that can be used to insert a link to the image. The image to the right was taken at the Chihuly exhibit at the de Young museum in San Francisco. The image is stored on my Flickr site and a placeholder is created on this Edublogs post that says, go fill this rectangle with whatever sits at the end of the link provided. Here’s the link as a web address. http://farm4.static.flickr.com/3145/2703276751_e717c90cdd.jpg?v=0

One of the most difficult concepts for teachers first dipping their toes into the web pool, is to understand that web pages are assembled from diverse streams of content. Web 2.0 requires users to manipulate these streams of content to build web pages that pull content from many different sources. I choose one site, Flickr, to organize my photos which appear on three different blogs and several wikis. I’ll continue to use Flickr as a central storage site. What’s different about psx is that photos can easily be manipulated with Photoshop editing controls through the browser. In edit mode, you can perform basic adjustments such as resizing and exposure level and red-eye correction. There are also a number of tuning and effects tools that are familiar to any Photoshop user. Teachers will quickly find that Photoshop Express provides a nice first-step for students to dive into the world of photo editing. Another benefit that the program’s Web 2.0 nature affords is the ability of students to photo edit at home for school projects.

My flower slide show was produced with images taken on May 11, 2008 during Lilac Sunday held at the Arnold Arboretum, Jamaica Plain, Massachusetts. The HTML embed code is automatically generated by psx.